Due
A pricing tool I designed and built
The product
Due helps freelancers work out what to charge. You paste in a brief, it lists the work line by line with the hours for each part, and you send your client a clean estimate to approve.
My role
Working out what to charge has always been my least favourite part of the job, so I built Due to do it with me.
I did all of it myself: the idea, the brand, the product design and the build. AI tools helped me with the code.

Brand Identity
Soft colours,
clear numbers.
Talking about money can feel stiff, so I wanted Due to feel friendly and still keep the numbers easy to read.
The brace and the arc from the logo wrap around every estimate, so each one looks like Due straight away. The colours are soft, with a strong red for the marks and a bright blue for the logo.
- #FEC4F0
- #ED1C24
- #BFE7FB
- #00BAF2
Product Design
How the app works,
step by step.
Here’s the product itself: how Due works and how it looks. Follow the five steps below, from the first screen to the estimate your client approves.
-
Step 1
Start with your rate
I made Due to make pricing my work easier. You sign in with your ChatGPT, so there’s no API key and no extra bill. Then you add your rate and the lowest rate you’d ever go. The sample estimate changes as you type, so you see right away what your hours are worth.
-
Step 2
New estimate
Starting a new estimate is really quick. Add the project name and client, pick the type, choose a colour for the sheet. That’s it, and you’re ready to tell the assistant about the project.
-
Step 3
Assistant builds the estimate
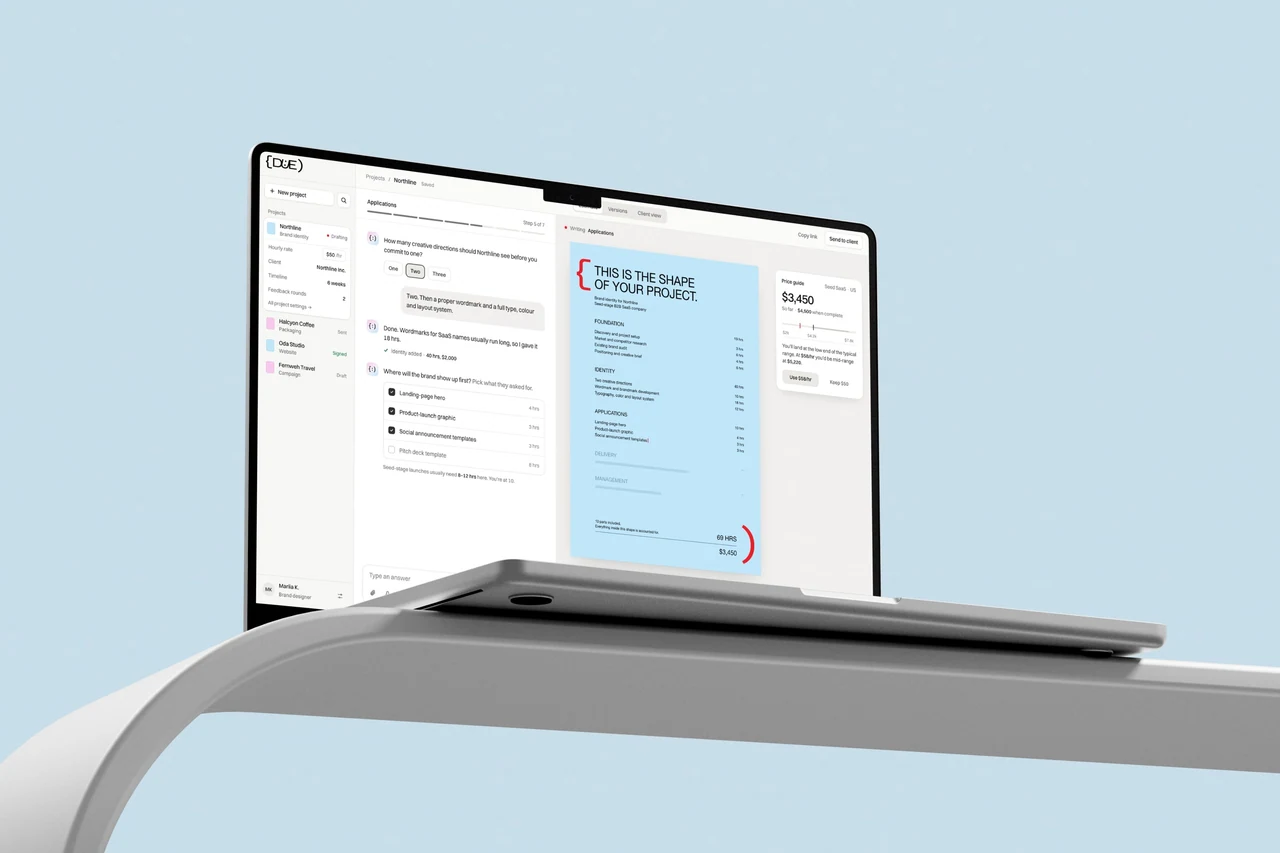
This is the part I wanted to show you. You describe the project in a sentence or two, and the assistant adds the lines and hours to the sheet while you watch. It also shows you what projects like this usually cost, then asks about anything it still needs to know.
-
Step 4
Change any line
The assistant only writes the first draft, you still decide. Click any line, change the hours, and the total updates right away. If your rate is low for this kind of project, Due tells you, and you can use the suggested rate in one click. Then pick a colour for the sheet, or go plain white with Official.
-
Step 5
Send and approve
When the estimate is ready, you send your client a link. They see the whole estimate on one clean page, type their name and approve. They don’t need an account.
The Estimate Sheet
The page your
client actually sees.
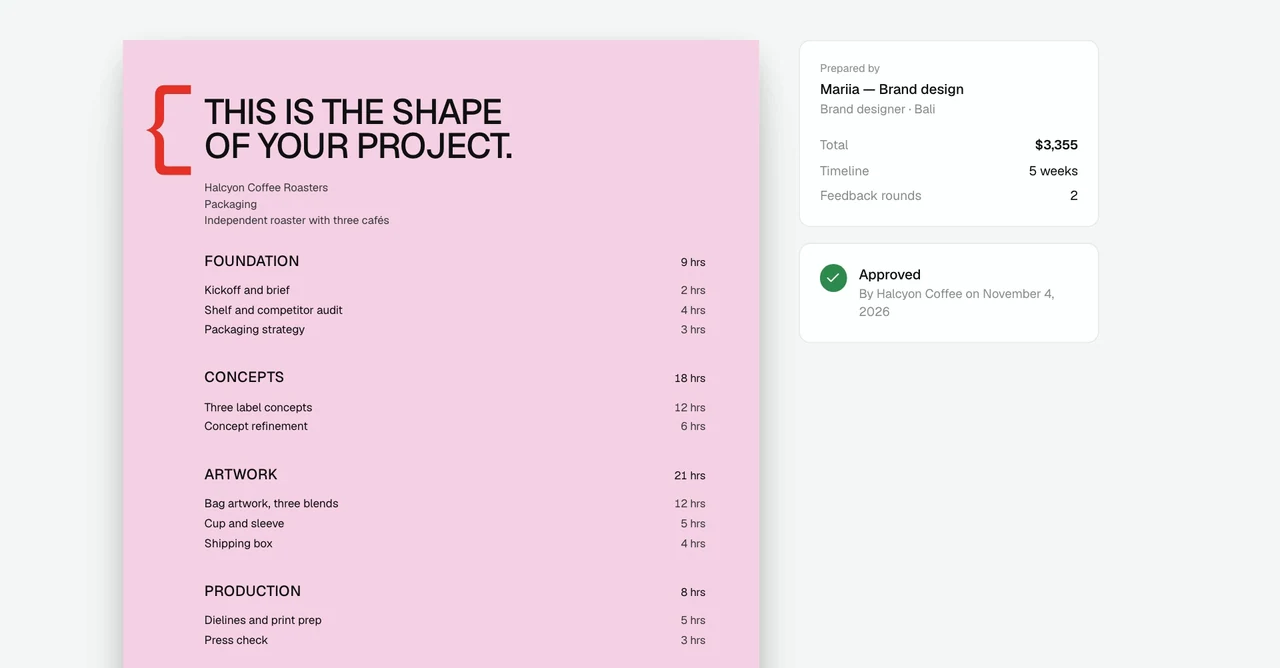
Every estimate opens with the same line: “This is the shape of your project.” Below it, the work is split into clear parts, with hours next to every line and the total at the bottom.
Your client sees what they’re paying for, not just one number at the end. There are five colours to pick from, or Official for a plain black and white version. It downloads as a PDF too.
The Client Page
Easy to read.
Easy to say yes to.
Your client gets one simple page with the estimate, the total, the timeline and the number of feedback rounds. When they’re happy, they type their name and approve, and the page shows who approved it and when.